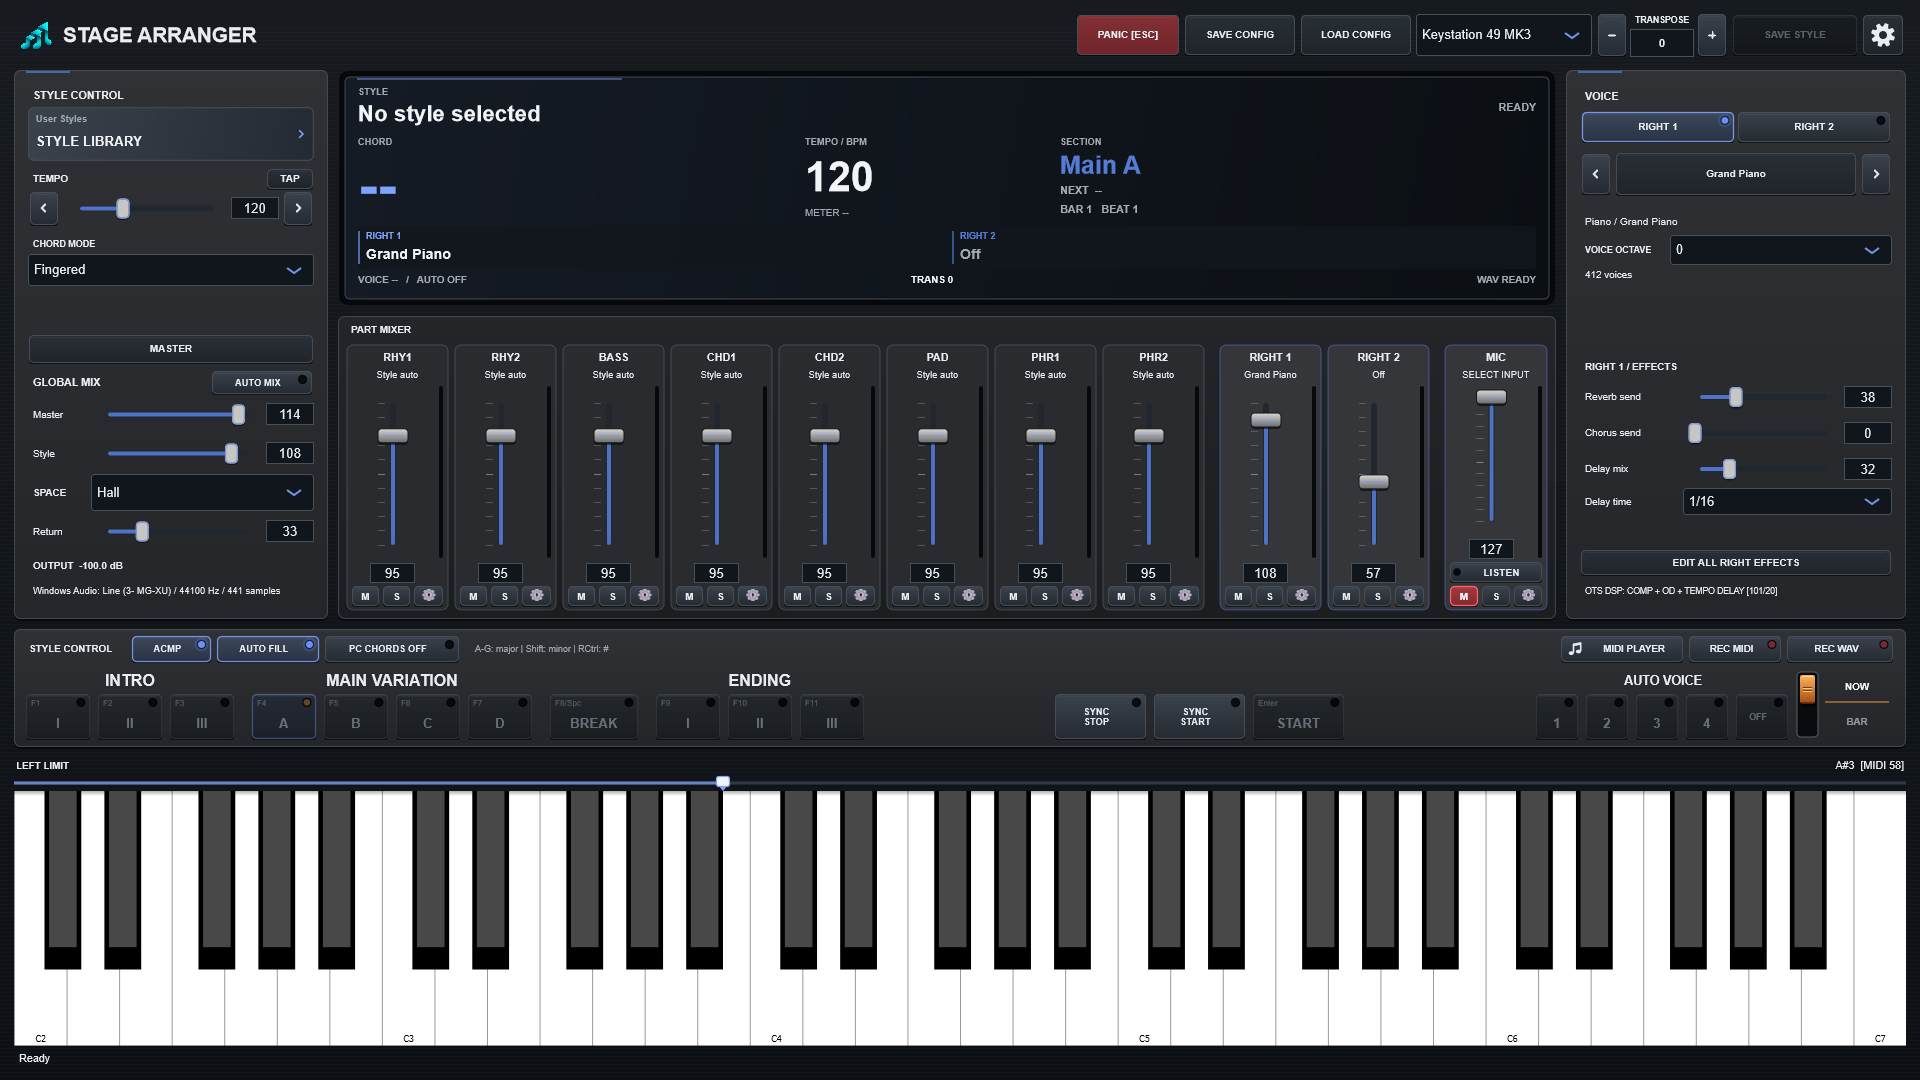


1. Connect audio and MIDI
Connect the keyboard and audio interface before opening Stage Arranger. Open the top-right Settings gear → Audio / MIDI. Choose the output device and channels, sample rate and buffer size. Use your interface’s native ASIO driver where available. Try 128-256 samples at 44.1 or 48 kHz; increase the buffer if you hear clicks.
Select your keyboard in the MIDI input list. Press a key and check the on-screen keyboard. Use wired headphones or speakers for live monitoring.
2. Select a sound bank
Open Settings → Sound Bank, select an installed bank and wait for loading to finish. Styles contain musical instructions, not their instrument samples; the bank is required separately.
3. Load a style and set the chord zone
Click the style name in STYLE CONTROL, open your User Styles folder and choose a compatible file. Drag LEFT LIMIT above the keyboard to choose the highest note of the left-hand chord zone. The initial default is F♯3 (MIDI 54); subsequent changes are remembered between launches. Select the CHORD MODE that matches your playing.
4. Start playing
- Enable ACMP.
- Choose Main A-D and, optionally, an Intro.
- Arm SYNC START.
- Play a recognised chord in the left-hand zone.
- Adjust TEMPO or use TAP. STYLE controls accompaniment level; Master controls final output.
5. Choose live voices
Select RIGHT1 or RIGHT2, then click the voice name to open the browser. RIGHT2 can be Off or layered with RIGHT1. Alternatively, press an available Auto Voice 1-4 to recall a style-specific setup.
6. Finish and save
Choose an Ending or press STOP for a musical finish. PANIC is emergency hard silence. SAVE CONFIG keeps your application setup; SAVE STYLE writes supported edits to existing Auto Voice slots. They serve different purposes.